Create groups and filtered dashboards to manage user access rights to specific dashboards and data.
Access rights are managed through different User Groups in Dear Lucy and different User Groups have access to different dashboards. Therefore, if you wish to restrict access to certain data for certain users, you should:
- Create a new dashboard that contains only the data you wish to share to your User Group.
- Create a new User Group and invite the relevant users to that group only.
- Select the newly created dashboard as the only dashboard available to those users that are in your user group.
You can read more about creating new User Groups here.
Set an active filter on your dashboard to further restrict data
You may want to create a dashboard that is visible only to a single person, showing only that person's data as a personal sales dashboard? Or, depending on your integration, you may want to share HR country data only with people from a certain country?
You can do this easily in Dear Lucy by applying activated dropdown dimension filters to the dashboards you are designating to the specific user group.
We'll use a case below where we want to create a personal sales dashboard only for one person, with only that person's data visible.
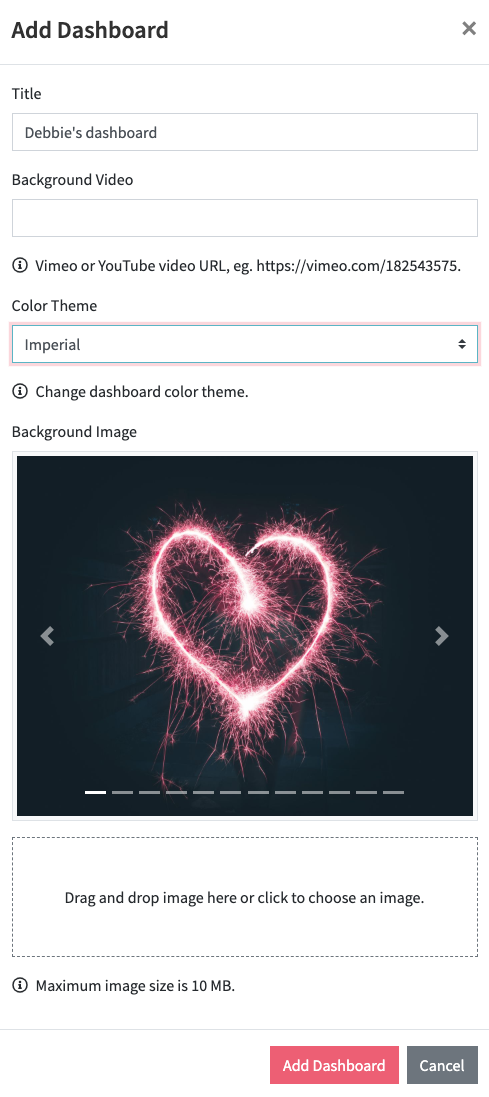
1. First create a new dashboard with the metrics we want to track: Settings > Dashboards > "+ Add Dashboard"
2. Enter the name of the dashboard, in this case our sales person is called Debbie, so we call it "Debbie's dashboard"
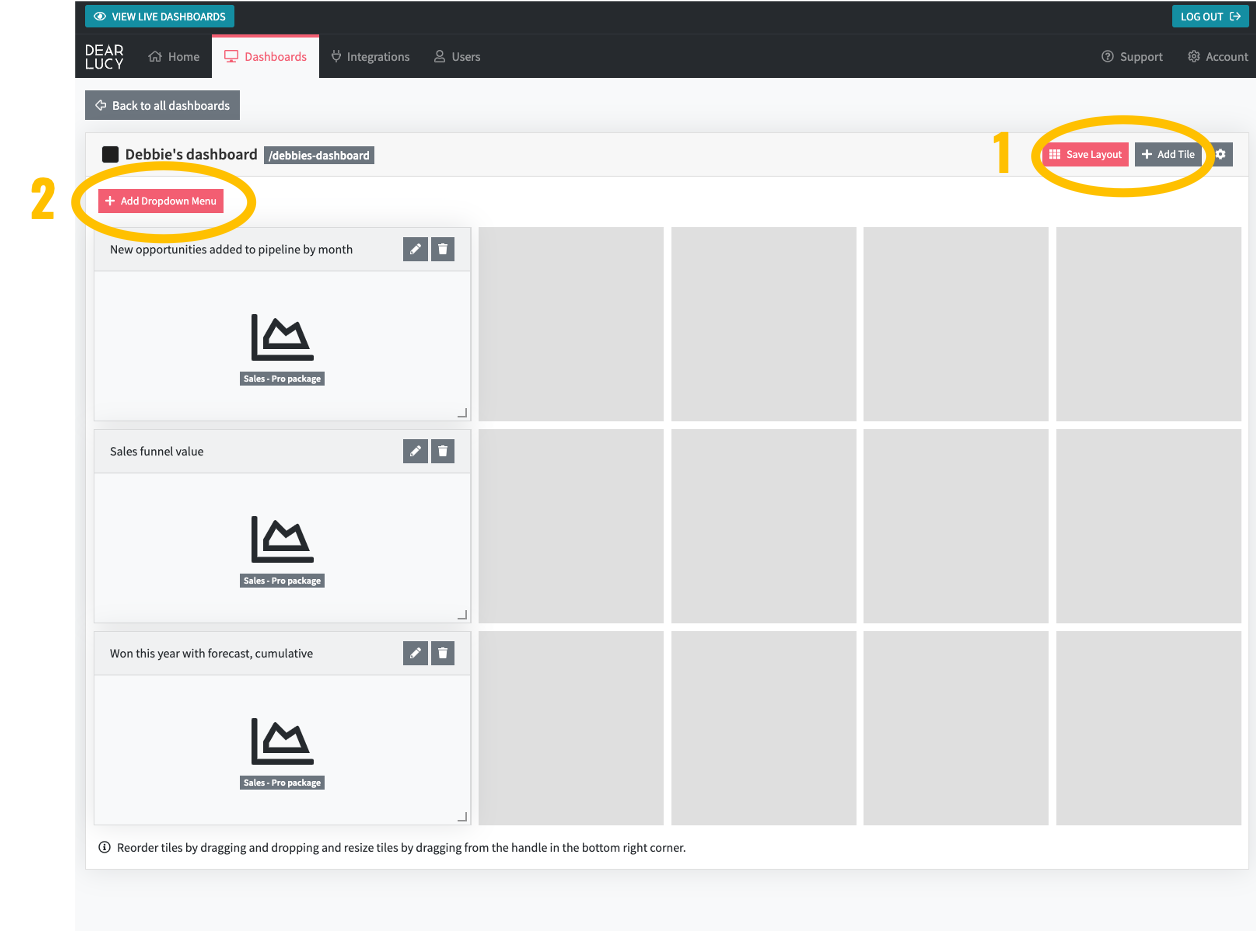
3. Add the selected metrics on your new dashboard by pressing "+ Add Tile". When you have finished adding the relevant metrics, remember to press "Save Layout". Then proceed to press "+ Add Dropdown Menu".
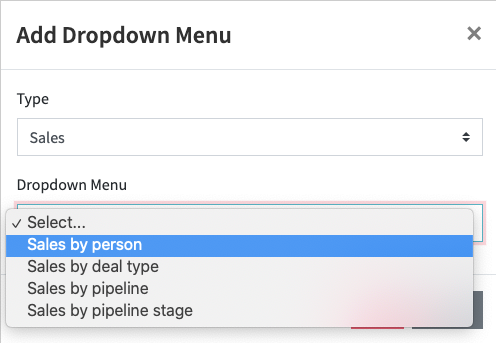
4. In this case we want to create a personal sales dashboard and therefore we select "Sales" as the dimension type and "Sales by person" in the Dropdown Menu field.
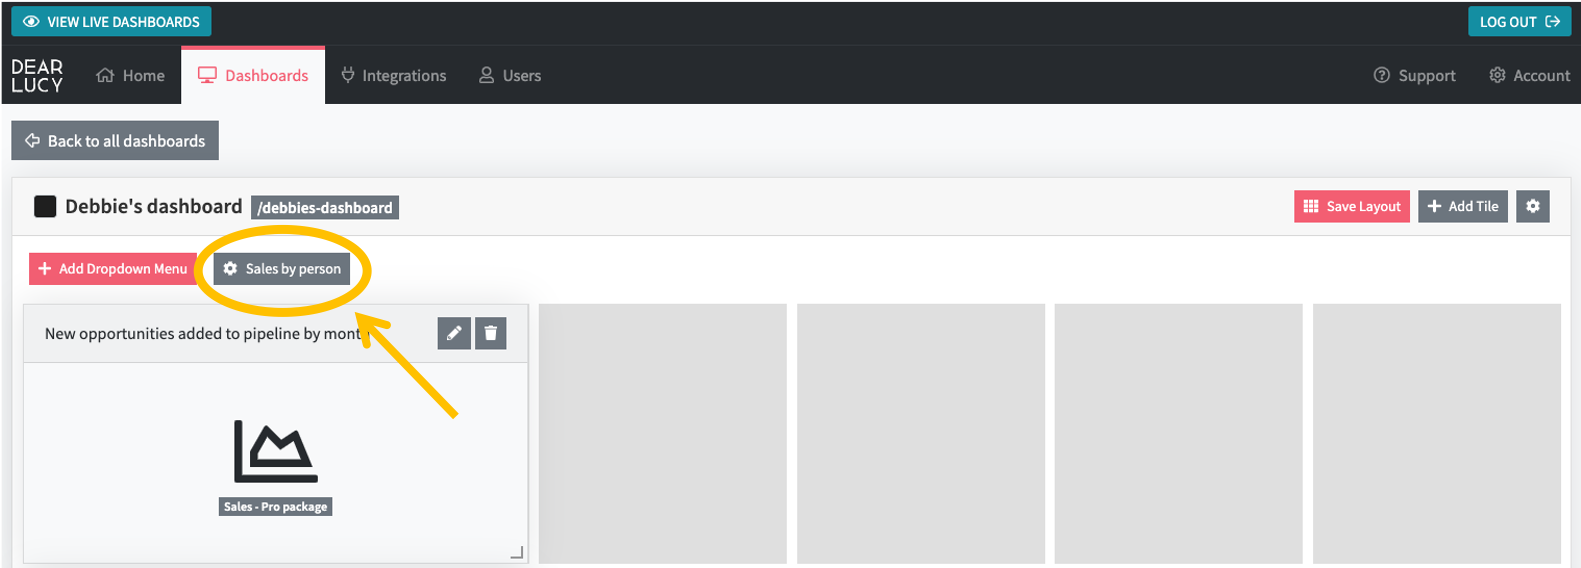
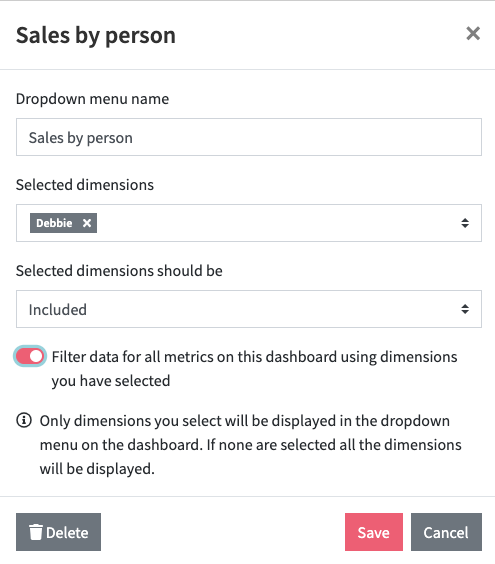
5. Once the dropdown menu has been added, click on the dropdown menu cogwheel to edit the filter.
6. In the dropdown menu editor we choose only Debbie in the field for "Selected dimensions" and that selected dimensions should be "included". We also tick the box to "filter data for all metrics on this dashboard using the dimensions you have selected".
This dashboards now only shows Debbie's data.
Create a User Group for the new dashboard with filtered data
Now we have made a dashboard for Debbie with only her sales data on it. The next step is to create a User Group which can access only this dashboard, and invite Debbie to this User Group.
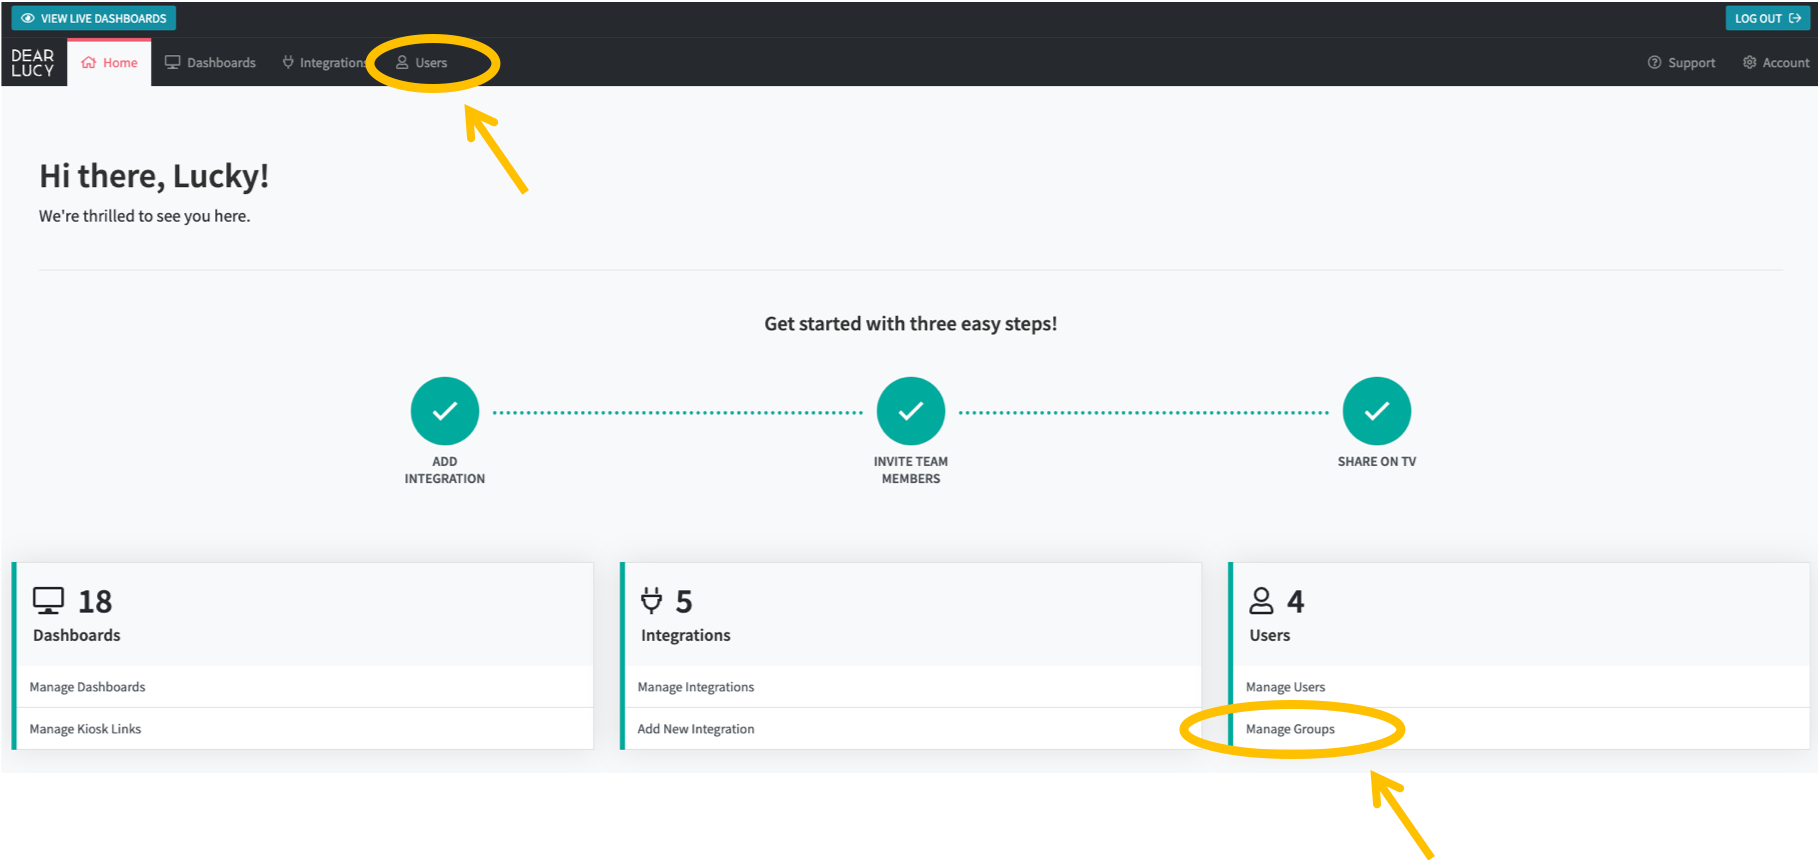
1. From the Settings Home screen, click "Users" from the menu or "Manage Groups" from the quick link.
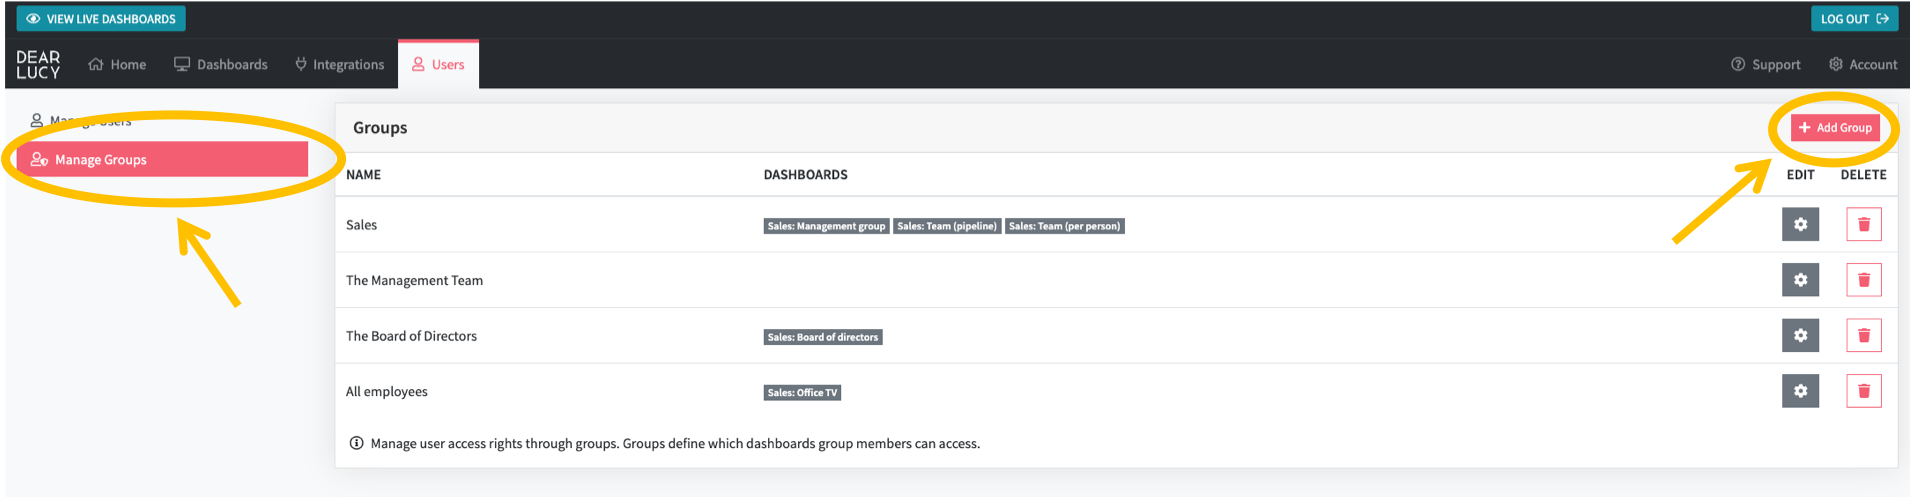
2. Click "+ Add Group" in the top right corner from the "Manage Groups"view.
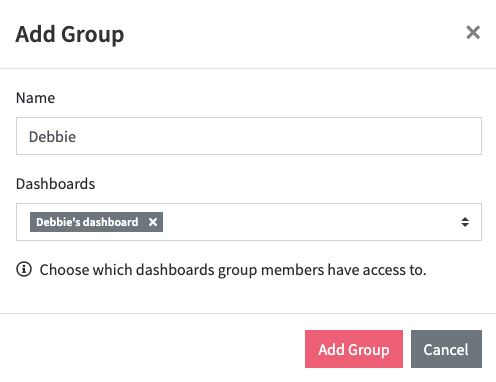
3. A pop-up window will appear where you can name your group, and select which dashboards that are visible for Users in this group. In the example below we have named the group "Debbie" and selected "Debbie's dashboard" as the only accessible dashboard to members of this group.
Click "Add Group" to save the new Group.
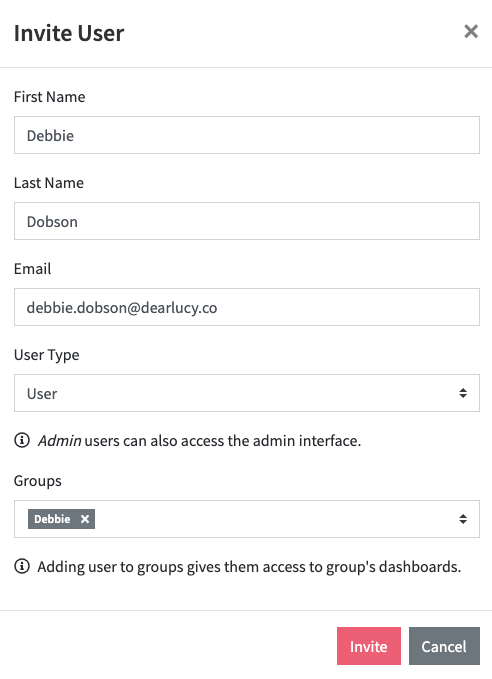
4. The final step is to invite Debbie herself to her own dashboard. Go to Settings > Invite User and add Debbie's details. In the field for "Groups" we select the group we just created, called "Debbie". Once we click "invite", Debbie will receive an invitation to Dear Lucy via email and she can only see her own dashboard called "Debbie's dashboard", which has only her own data in it.
Please note that since Debbie here above is a "User", she cannot change what data and dashboards she can access. However, if we had invited Debbie as an Admin, she could herself change her access right in Settings and be able to be part of other groups too and access additional dashboards.
To summarize - how to create dashboards for Users with a specific profile:
- Create a new dashboard with dimension-specific activated filters on it
- Create a User Group which can only access the new dashboard
- Invite the User to Dear Lucy and assign her/him to the new User Group that can only access the new dashboard
Comments
0 comments
Article is closed for comments.